

The Ultimate Blog Proofreading Checklist
You’ve written your blog post, formatted the headers, added a few images—and you’re this close to hitting publish. But before you do, it’s time to slow down and give your post the final polish it deserves. This proofreading checklist will help you catch the small mistakes that can quietly undermine great content.
Even the most helpful post can lose impact if it’s full of typos, clunky sentences, or broken links. These little details don’t just distract your readers—they can also chip away at your credibility and authority.
The good news? You don’t have to be a professional editor or proofreader to clean up your content. You just need a clear, simple process to follow.
That’s exactly what this checklist is here to give you.
Whether you’re a beginner blogger or a seasoned solopreneur, this step-by-step guide will help you proofread your blog post with confidence—so your message shines, not your mistakes.
TL;DR:
Use this blog proofreading checklist to catch common mistakes, polish your writing, and make sure every post you publish feels professional, clear, and trustworthy.
Why You Should Use a Blog Proofreading Checklist Before You Hit Publish
It’s easy to think proofreading is just about catching typos—but it’s so much more than that.
Taking a few extra minutes to proofread your blog post before you hit publish helps ensure your content makes the impact it’s meant to.
It’s about clarity, professionalism, and building trust with every word you write.
Here’s why it matters:
First impressions count
Your blog post might be someone’s very first encounter with your brand. A polished post signals that you’re thoughtful, detail-oriented, and credible—even if you’re new to the blogging world.
Clean writing keeps readers focused
When your sentences flow and your message is clear, readers are more likely to stay on your page and absorb your content (instead of skimming or clicking away in frustration).
Mistakes can distract—or even confuse
A misplaced comma or awkward sentence might not seem like a big deal… until it changes the meaning of what you’re trying to say. Proofreading helps protect your message.
Clear content builds trust
Your readers want to feel confident that they’re learning from someone who knows what they’re doing. Strong, clean writing helps position you as that person.
Want to know why every single blogger needs a proofreader? Check out my post here.
The Ultimate Blog Proofreading Checklist: Everything to Review Before You Publish
Use this blog proofreading checklist to give your post one final pass before it goes live.
These quick checks can help you avoid small mistakes that distract from your message—and help your content shine from start to finish.
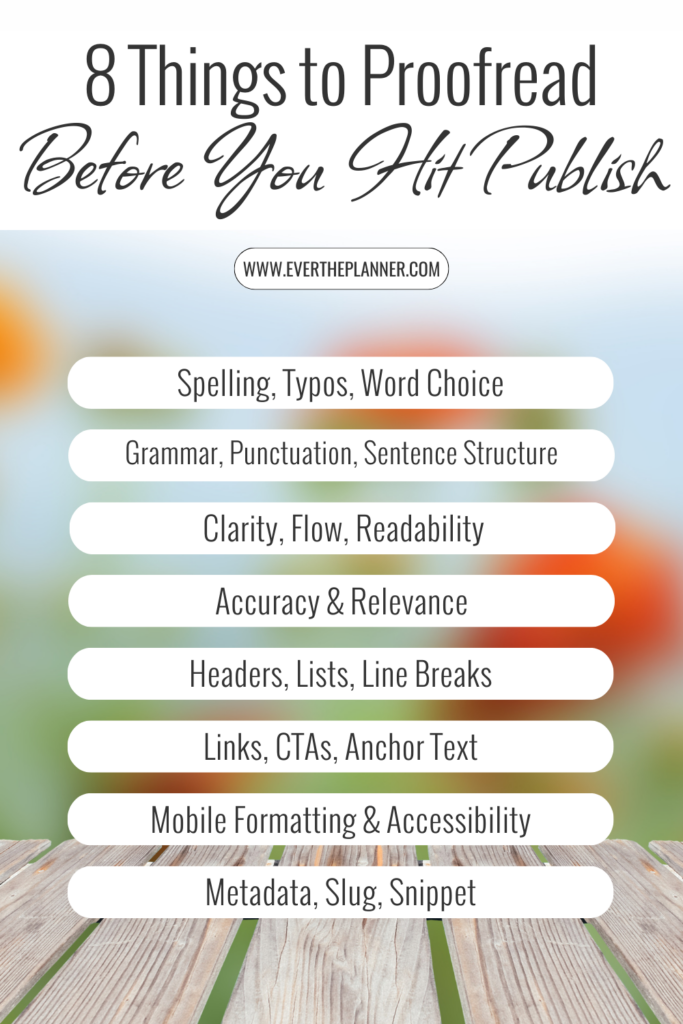
Step 1: Proofread for Spelling, Typos, and Word Choice
Even if you’ve used spellcheck and Grammarly, it won’t catch everything. Here’s a list of things to check for:
- Run spell check – But don’t rely on it completely. Use a tool like Grammarly to help catch the big errors, but always go back through to check for the rest of the items on this list.
- Double-check commonly confused words – We’re talking the big baddies here: your/you’re, its/it’s, there/their/they’re. This also applies to commonly confused phrases such as “I couldn’t care less” (NOT I could care less). To see an amazing list of these, check out Sarah Townsend’s post 19 common expressions you’re getting wrong… plus a classic Friends moment.
- Verify names, brand terms, and product titles
- Watch for homophones – to/too/two, then/than, affect/effect
- Check for accidental double words – e.g., “the the”
- Look for auto-correct fails – We’ve all been a victim of a tragic auto-correct fail. Don’t be that person!
- Correct misspelled keywords or tags
- Be consistent with US vs. UK spelling, depending on your audience
- Catch typo-masking words that are spelled correctly but misused in context – Example: Their are to many cookies four me too eat.
Step 2: Check Grammar, Punctuation, and Sentence Structure
Grammar errors are easy to miss when you’re close to your content. Run through this quick grammar check:
- Fix incomplete or run-on sentences
- Check comma placement (especially in lists and clauses)
- Use apostrophes correctly (its vs. it’s, plurals vs. possessives)
- Ensure subject-verb agreement
- Watch for passive voice – Use active where possible. For example: (Passive) The picture was drawn by me. (Active) I drew the picture.
- Correct misplaced modifiers – These are modifiers that are placed too far from the word it’s describing, which can make the sentence awkward or confusing. For example: My cat sat on the pillow by the chair that is too small for him. Is the pillow too small or the chair? Which one?
- Avoid excessive exclamation points or ellipses – Too many exclamation points… and ellipses… can distort your message!
- Check quotation marks and punctuation placement
- Use colons and semicolons properly (if used at all)
- Break up overly long sentences
Step 3: Improve Blog Post Clarity, Flow, and Readability
Great writing isn’t just about the words—it’s about how they feel. Try the following:
- Read each sentence out loud—does it flow naturally?
- Simplify overly complex or academic phrasing
- Avoid jargon unless it’s audience-appropriate
- Cut filler words (really, very, actually, just, literally, etc.)
- Trim redundant phrasing
- Use varied sentence lengths
- Watch for vague pronouns (e.g., “this” or “it” without clear reference)
- Add transitions to improve paragraph flow
- Replace weak verbs with stronger ones
- Clarify any confusing or awkward phrasing
Step 4: Verify Blog Post Accuracy and Relevance
Avoid publishing outdated or incorrect information. Double-check:
- Stats or claims
- Names, dates, and references
- Time-sensitive info
- Make sure you didn’t contradict yourself in different sections
- Ensure the content actually delivers on the promise of the headline
- Cross-check that all quoted material is accurate and attributed
Step 5: Format Your Blog Post for Clean Visual Layout
Formatting can make or break your blog’s readability. Check for:
- Consistent header styles
- Hierarchy of content is clear and easy to follow
- Enough white space between paragraphs
- Bulleted and numbered lists formatted correctly
- Bold and italic text used intentionally
- Quote blocks, dividers, or callouts styled properly
- Line breaks are consistent and clean
- There is a feature image if needed
- Section breaks are placed logically for readability
Step 6: Proofread Your Blog Links, CTAs, and Anchor Text
Broken or confusing links are a fast way to lose trust. Run this quick link check:
- Do all internal links work and open in the same tab?
- Do all external links open in a new tab?
- Are affiliate links clearly marked or disclosed?
- Are links labeled clearly?
- Is your main CTA clear and easy to find?
- Are you linking to relevant posts, services, or freebies?
- Do anchor texts use keywords where appropriate?
Step 7: Mobile Formatting and Accessibility Review
Your blog might look great on desktop—but most readers are on mobile. Make sure:
- Your post is easy to read on a phone or tablet
- Images resize properly and don’t break layout
- Paragraphs don’t feel cramped or overwhelming
- Are alt text and image descriptions included?
- Buttons and links are easy to tap
- Is contrast high enough for readability (especially over images)?
Step 8: Final Blog Proofreading Checklist Touches
Before you call it done, do a quick final pass:
- Read it out loud to catch weird flow or tone
- Use a text-to-speech tool to listen to your post
- Print it out or change the font temporarily to catch errors
- Ask yourself: “Would this make sense to a first-time reader?”
- Ensure the tone matches your brand voice
- Confirm your name or byline is correct (if included)
- Make sure your metadata (SEO title, meta description) is complete
- Double-check the post slug and URL structure
- Review preview snippet (on your blog homepage or search engine preview)
Extra Tips: How to Self-Edit and Proofread More Effectively
Proofreading isn’t just about what you check—it’s how you check it. Here are a few simple techniques that can help you catch more mistakes (without spending hours on every post):
Step Away First
Take a short break before proofreading—even 10 minutes can give your brain a reset. When you come back with fresh eyes, you’ll spot things you would’ve missed in the moment.
I know that when I try to proofread something I just wrote, I’ll miss so many details because my brain fills in exactly what I thought I wrote instead of seeing what’s actually on the page.
A short break is the shortcut to being able to recognize those mistakes easier.
Read Your Blog Post Out Loud
This is one of the easiest and most effective ways to catch awkward phrasing, run-on sentences, or weird tone shifts.
When you read your post out loud, it allows you to hear how your audience is going to read what you’ve written.
Sometimes things sound great in our heads, but out loud… not so much.
Change the Format
Try reviewing your post in a different font, or copy it into a plain-text app like Notepad or Google Docs.
Seeing your words in a new layout helps your brain shift from creator to editor and can make some mistakes pop out to you a little easier.
Use Editing Tools (As a Second Pass)
Tools like Grammarly or Hemingway can be helpful—just use them after you’ve done a first read on your own. They’re great for flagging grammar, but they don’t know your voice like you do and can miss homophones.
Final Thoughts: Use This Blog Proofreading Checklist to Publish with Confidence
This blog proofreading checklist will help you make sure each post reflects your voice, message, and quality before you share it with the world.
You don’t have to be a professional editor to produce high-quality content. You just need a clear process, a few intentional edits, and the confidence to slow down before you hit publish.
Use this blog proofreading checklist as your go-to final step before sharing your post with the world. With time, it’ll become second nature—and your content will only get better from here.
And if you ever want a second set of eyes, I offer proofreading services just for bloggers—because sometimes, a little backup is all you need to feel ready. You can find my proofreading services here.
Proofreading helps your blog stand out in the best way. Use this checklist to review spelling, grammar, formatting, readability, and mobile view—so your message shines, not your mistakes.

Be the first to comment